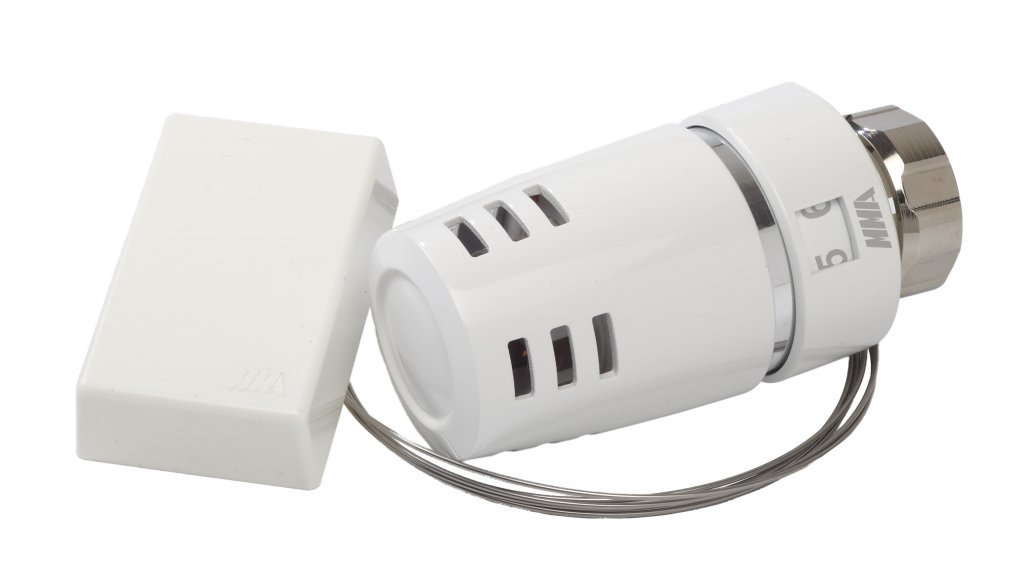
EVO-Z Direct Mount Operator w/Remote Sensor

Overview
 The sensor on the EVO-Z is wax-filled and the wax volume varies according to ambient temperature. The volume changes are transmitted to the valve stem via a liquid capillary system. The valve body has a return spring which closes the valve when the stem is under low pressure. When the force from the sensor and the return spring are balanced to the room temperature selected, the valve disc stops in that position to allow a certain amount of water or steam to flow through the valve. Ambient temperature changes cause the valve disc to change position and thereby continuously modulate the flow so that the room temperature is maintained at the desired temperature. The unit is secured against damage from over-pressure by a built-in pressure absorbing spring.
Features
- Valve-mounted setting knob and remote temperature sensor
- Brass sensor, High sensitivity
- Fiberglass valve plug shaft
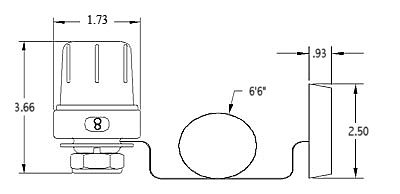
- Stainless steel capillary tube, 6’6” standard length
- Longer capillary available, consult factory
- Fits all Macon NT series valves
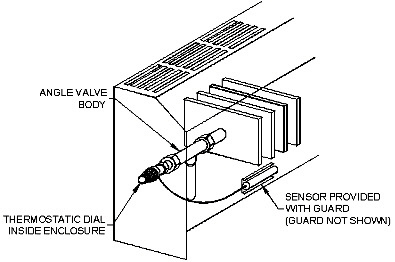
- Replaces the valve-mounted sensors on built-in convectors, etc., and where the valve-mounted sensor is exposed to draft from doors and windows
- Fully automatic – nonelectric, no wiring
- Manufactured to exacting standards using exceptionally high quality materials
- Each sensor is tested and re-checked to achieve exact settings before leaving the factory
- Note that changing the actuator can be accomplished without draining the system
- All Macon thermostats can be locked at or limited to a specific temperature or temperature range
- Simple one-trade installation
- Sensor guard furnished at no extra cost
- All Macon valves and thermostats conform to ASHRAE Standard 102P-1983 and European Standard EN 215/1215. We are also ISO 9001 certified (2002) and ISO 14001 certified (2002).
Specifications

| DATA Temp. Range: 50° – 82°F Hystersis: 0.9°F Heat Transfer: 1.1°F (Valve Housing Sensor) Dead Time: 0.8 Minutes Max. Differential Pressure: 20 psi Sugg. Differential Pressure = 0.5 to 2.9 psi Max. Water Temp.: 250°F Max. Storage & Ambient Temp.: 122°F Max. Steam Pressure: 15 psig Max. Movement: 0.125 inches Long Term Test: 5000 cycles (1.3°F) |
| DIAL SETTINGS: * = 50°F (Frost Protection) 1 = 54°F 3 = 61°F 5 = 68°F 6 = 72°F 7 = 75°F 8 = 79°F 9 = 82°F |
 |
Min/Max Settings
Maximum setting
1. Turn the wheel to maximum.
2. Push the mark in with limit tool (located opposite the dial setting window) and press in the wheel handle 1-2 mm until it stops.
3. Remove the limit tool and press in the wheel handle until it stops.
4. Set the required temperature according to the chart above.
5. Pull the wheel handle out and the maximum temperature is set.
Minimum setting
1. Turn the wheel to minimum
2. Push the mark in with limit tool (located opposite the dial setting window) and press in the wheel handle 1-2 mm until it stops.
3. Remove the limit tool and press in the wheel handle until it stops.
4. Set the required temperature according to the chart below.
5. Pull the wheel handle out and the minimum temperature is set.
Click Here for Cross Reference chart of Previous Generations of Non-Electric Operators
